Saturday, October 2, 2021 – Handmade Cards
- Mary Reed

- Oct 2, 2021
- 11 min read
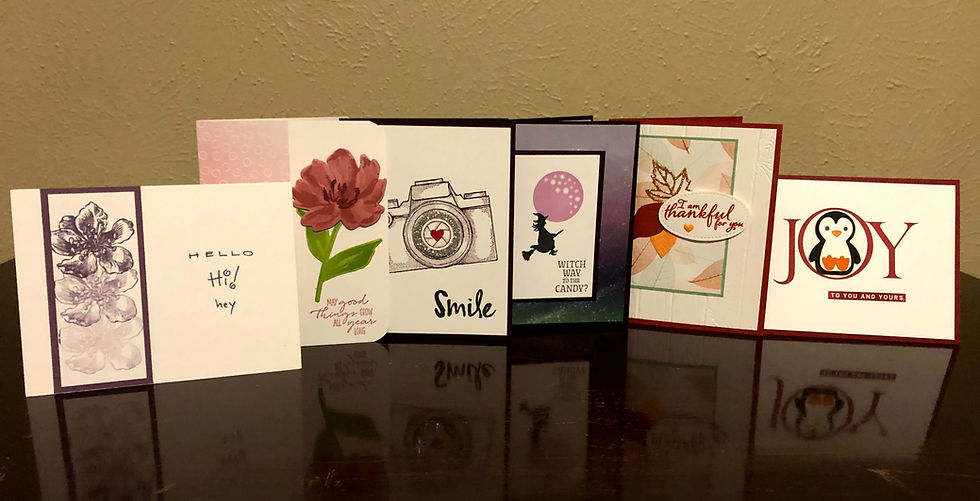
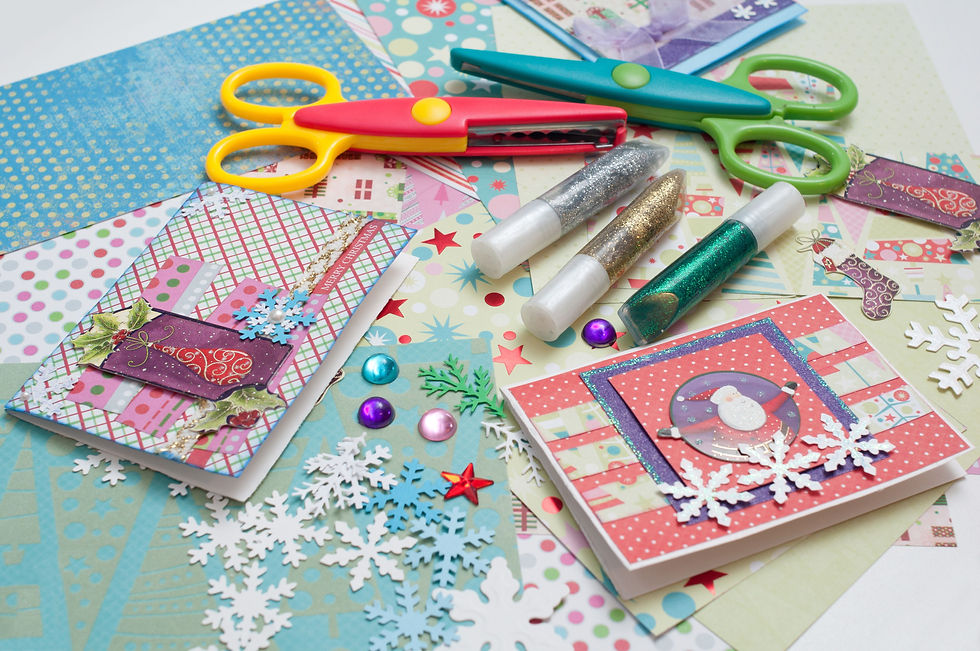
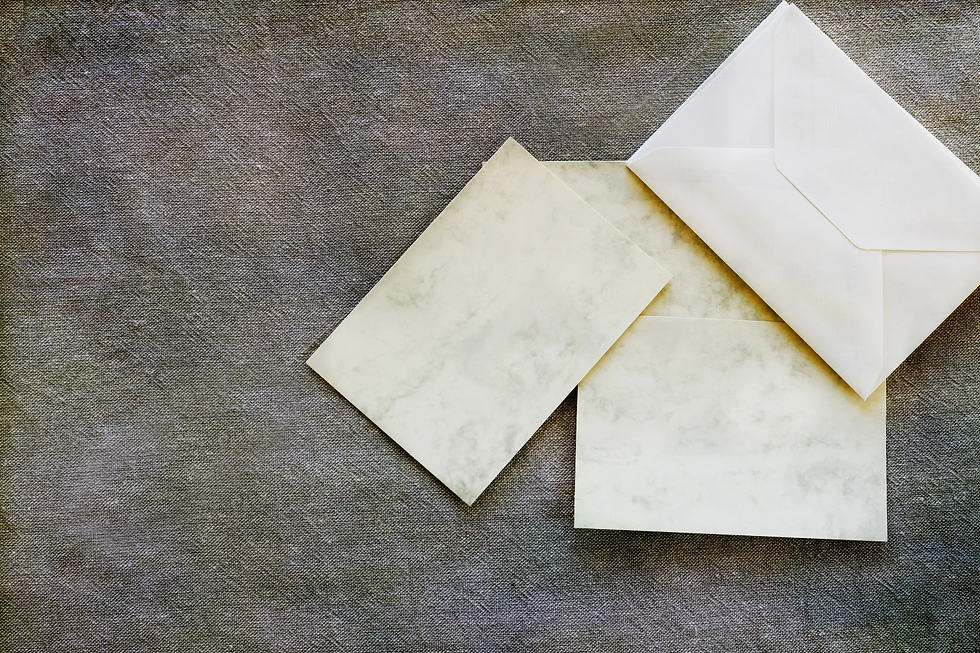
The photo shows some of the cards I have made. Addison resident Jill Lemke offers cardmaking classes in her home once a month. You pay her $10 and get three handmade cards to take home. I really like making cards this way. I don’t have to buy any of the expensive products needed to make cards, and they still cost less than the regular cards you buy in the store. Plus, they look great. She uses Stampin’ Up! products. Also, I am not very creative in making cards, so I like having her displays showing you what can be done. She even makes up individual plastic bags with everything you need in that bag for one card. There is some skill involved. Some of the pieces are very tiny, and if you’ve got glue on it, you must be careful to stick it in the correct place. Today, I made a card, and used a piece of equipment I had seen Jill use before many times. I thought I could do it by myself. The sentiment I was trying to stamp on the card was upside down! Thankful that Jill really wants me to have a good cardmaking experience, so she made me another card with the sentiment stamped right side up. Then the “Hand stamped by me” stamps I put on the back of one card showed only half the stamp. Jill diecut another piece of card stock to cover it up with the full stamp on it. So, don’t think I am going to be having my own cardmaking business soon. Very grateful for Jill who always helps me with my mistakes. At any rate, cardmaking is big business, and many people really like it. Let’s learn more about it.
According to Wikipedia, cardmaking is the craft of hand-making greeting cards. Many people with interests in allied crafts such as scrapbooking and stamping have begun to use their skills to start making handmade cards, contributing to cardmaking becoming a popular hobby.
Traditional high street stores have begun to devote an increasing amount of their floorspace to handmade cards. Handmade products are now being seen by retailers as a way to increase margins, and handmade cards are no exception. This is particularly the case as mass-produced printed greeting cards have been faced with competition from electronic greeting cards. Over seven billion greeting cards were sent in the U.S. alone last year; greeting cards are a multibillion-dollar business.
In contrast, hundreds of small businesses have been set up by avid crafters keen to make a return on their cardmaking efforts. Many of these are taking advantage of the low setup costs of web-based selling and the wide customer base of auction sites like eBay. Many others continue to sell their creations at craft fairs, markets and fêtes. Others use their cardmaking skills to turn a profit in the wedding planning market making handmade wedding invitations and favors.
There are many different variations of handmade cards including decoupage more commonly known as 3D — where a design is printed a number of times, then various areas of the design are cut and layered on top of each other using double-sided sticky foam squares to mount the layers together to create the 3D effect, making a very attractive greeting card.
History
The custom of sending greeting cards can be traced back to the ancient Chinese — who exchanged messages of good will to celebrate the New Year — and to the early Egyptians, who conveyed their greetings on papyrus scrolls.
By the early 15th century, handmade paper greeting cards were being exchanged in Europe. The Germans are known to have printed New Year's greetings from woodcuts as early as 1400, and handmade paper Valentines were being exchanged in various parts of Europe in the early to mid-15th century.
According to “The History of Greeting Cards” at greetingcard.org, in 1849 Esther Howland was the first regular publisher of valentines in the U.S. and sold her first handmade Valentine. She established a successful publishing firm specializing in elaborately decorated cards.
According to Wikipedia, however, by the 1850s, the greeting card had been transformed from a relatively expensive, handmade and hand-delivered gift to a popular and affordable means of personal communication, due largely to advances in printing and mechanization.
According to “The History of Greeting Cards” at greetingcard.org, in 1856 German immigrant Louis Prang opened a small lithographic business near Boston, and America’s greeting card industry began. The Greeting Card Association recognizes the Father of the American Christmas Card with its annual LOUIE Awards, the definitive competition of the greeting card and social expression industry. By 1866, Prang perfected the color lithographic process, as shown in his reproductions of famous paintings, surpassing the quality produced by craftsmen in the U.S. and England. In 1875 he introduced the first complete line of Christmas cards in America.
According to Wikipedia, the first Christmas cards appeared in published form in London in 1843 when Sir Henry Cole hired artist John Calcott Horsley to design a holiday card that he could send to his friends and acquaintances. Technical developments like color lithography in 1930 propelled the manufactured greeting card industry forward.
During the 1980s, the trend began to turn, with consumers increasing looking for greeting cards that were differentiated from the standard offering. In the late 1990s, e-cards made their way into the market.
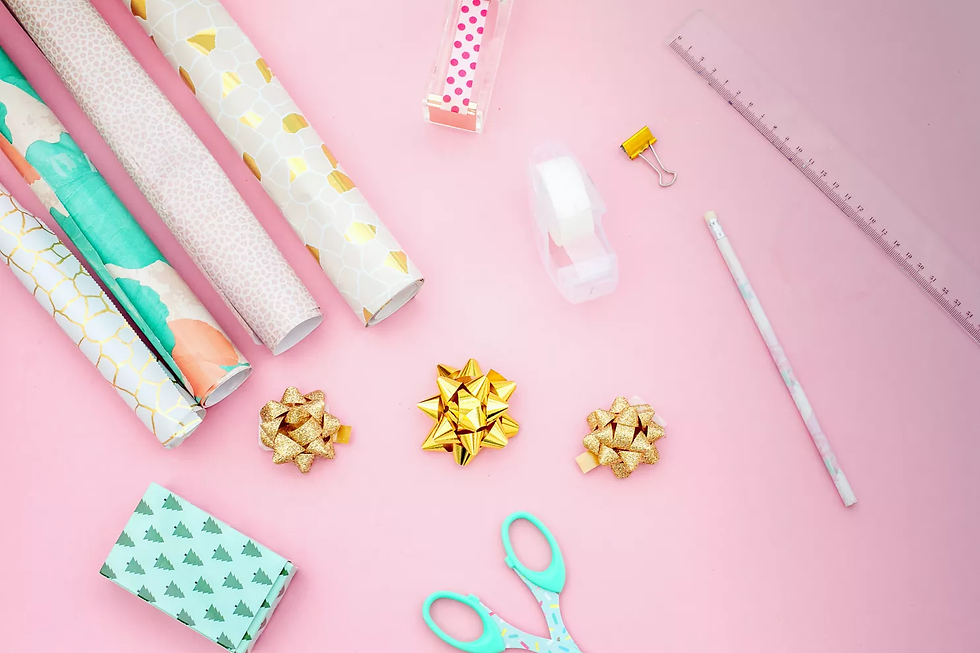
Materials
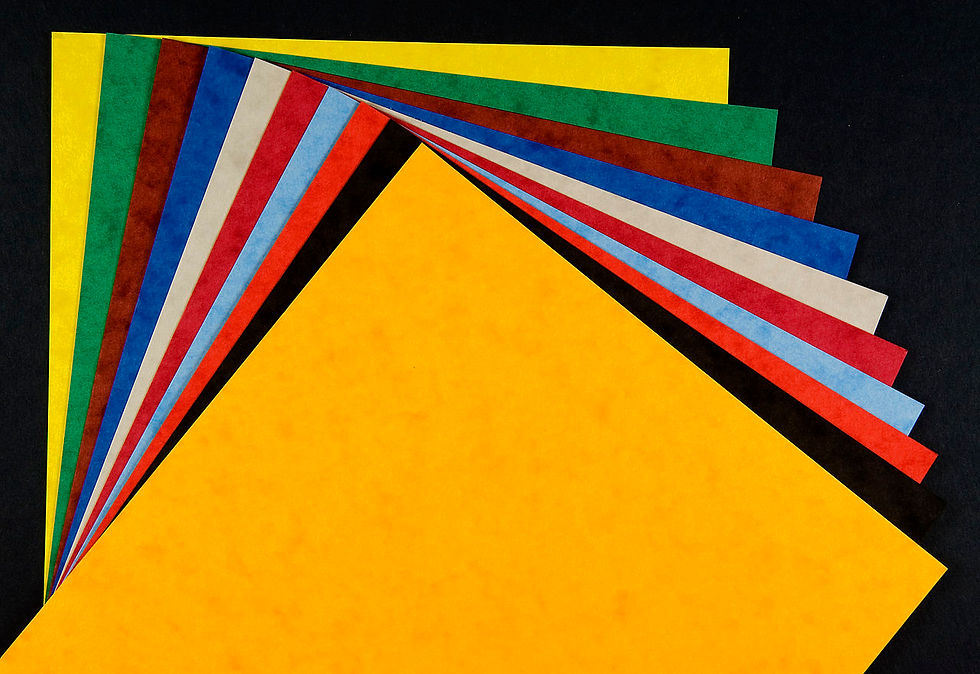
Common cardmaking materials include: cardstock, stencils, markers, vellum, tissue paper, glue, rulers and t-squares, rickrack, foil, sequins, beads, ribbon, acetate, paper embossing, die cutting machines and more. Other materials that can be used in cardmaking are brads, eyelets, tea bag medallions and buttons. Brads can be used to hold the four corners of one piece of cardstock on top of another to create a layered effect. Eyelets can be used to draw a piece of string or ribbon from one side of the card to another. Tea bag medallions are a type of origami that makes a wonderful decoration for the front of a card. Pretty shaped buttons make nice additions to a design. Other ways of decorating cards include using rubber or polymer stamps to add images or sentiments to the card which can then be colored or decorated using a wide variety of paint or ink techniques.
According to the article “Top 12 Card Making Tips and Tools From the Pros” at craftwarehouse.com, there is nothing quite like the joy of creating handmade cards for family and friends. This popular craft can seem a little intimidating to get started, so here are the top 12 card making and paper craft tips from the pros.
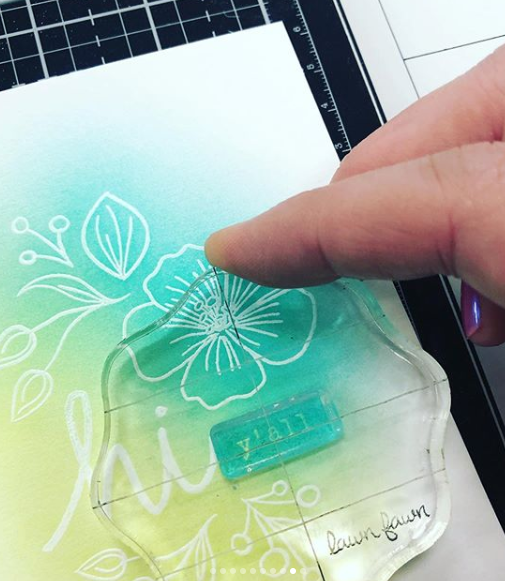
1. Clear stamps
Clear stamps may not be new, but it is surprising how many people don’t use clear stamps and are kind of intimidated by them. Clear stamps take up less space and are easier to store. But, most importantly, clear stamps are used with clear stamp blocks, which makes it easier to create the layout you want because you can see your design through the clear stamp block. You can also create “custom stamps” by combining small stamps together on the block. Using clear stamps and clear acrylic blocks have become a real game changer in stamping.
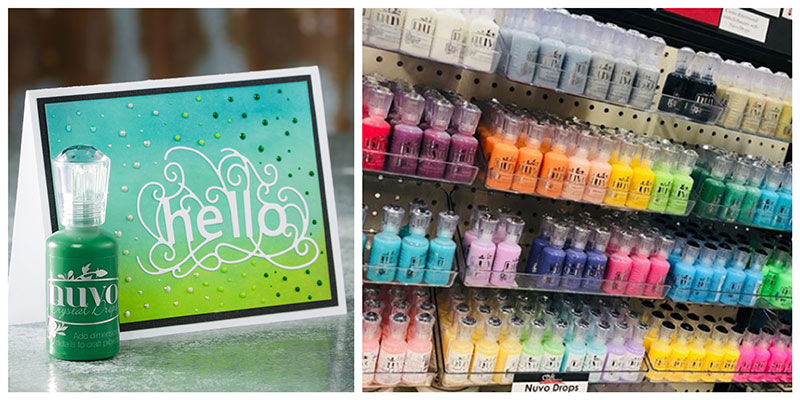
2. Nuvo Drops
Nuvo Drops make gorgeous little raised dots on your paper craft projects. They are way more affordable than embellishment epoxies, and you can customize size, layer color in color and more.
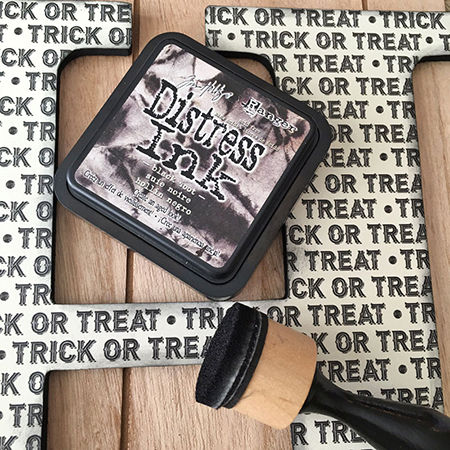
3. Distressing paper edges
One of the tricks that cardmakers and craft paper artists use is inking the sides and edges of cut paper. When you cut paper there will be a white core showing and just by darkening this edge with ink you can make your project look better. Many people use the ink to come in on the edge of the paper shape, which gives the paper an aged or grunged effect, adding a lot of depth to the piece. Tim Holtz Distress Ink pads were made just for this purpose and work best this way.

4. The Quikstick Tool by We R Memory Keepers
This quicker-picker-upper is what you will want when working with anything small; small bits of paper, googly eyes, sequins, pearls, rhinestones, charms and more. One end has a low tack sticky point which helps pick up and place small items. The other end has a clear small plastic chisel shape which is ideal for moving small or tiny items in place. Pull that chisel end out and you will find a pointed acrylic end as well. And speaking of acrylics, if you have long nails or no nails, this will be extra handy for you.
5. Quality matters
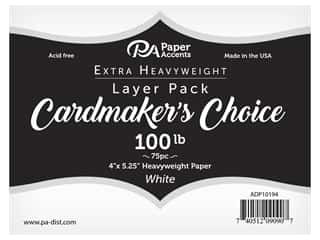
The better quality paper and ink you use, the better your project will turn out. For example, ultra-smooth heavyweight or 100-lb cardstock is the best for stamping onto and coloring because it accepts all kinds of inks beautifully, achieving clear crisp images. The kind of ink pad you use matters, too. Craft Warehouse’s No. 1 favorite ink pad is Versafine.
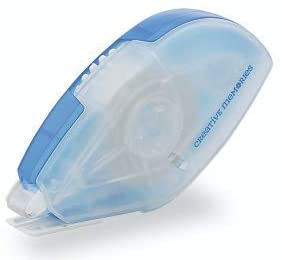
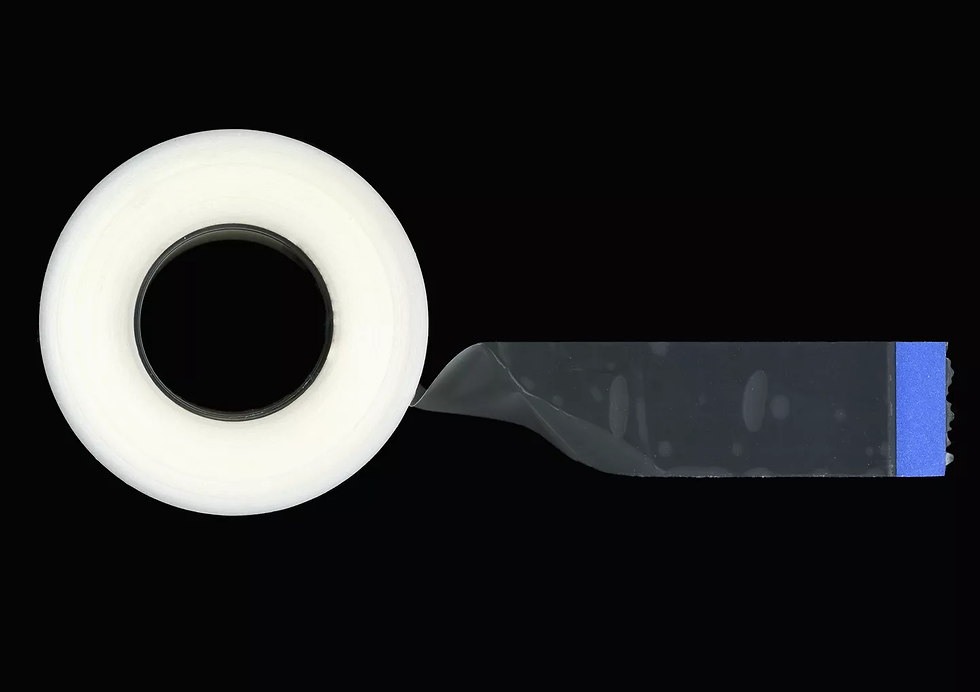
6. Tape runners
Tape runners are kind of a game changer when doing paper crafts. They’re cleaner to use and hold better than most other other ways of gluing paper. The only drawback is that they can be hard to use with cut-outs or to get the glue on the edge. If this is something you’ve experience, try the Tombow Mono Dots Adhesive Tape Runner. The dot pattern means that it doesn’t clump up, and it can be applied in curved lines. Equally as helpful is the fact that when it first goes on, it’s removable so you can reposition it. After a while the adhesive will become permanent.

7. Creating backgrounds with ink pads
The hybrid mix of pigment and dye ink formula that the Tim Holtz Distress Oxide Ink Pads are made from means that you can create beautiful seamlessly blended inked papers when applied with blending foam or a blending brush. These inked papers can then be used for backgrounds, or you can stamp over them or cut out shapes from them with punches and dies. Techniques abound with these ink pads including stamping, watercoloring and more!
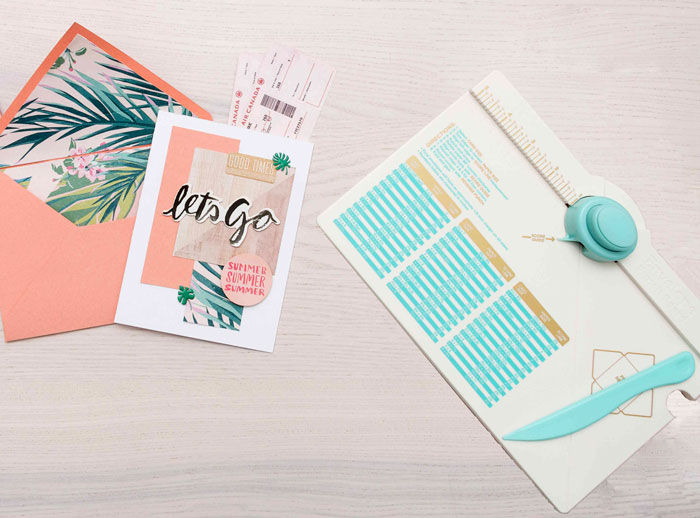
8. Envelope punch board
With an envelope punch board, you can make your own envelopes up to size 6″ x 8.5″. That’s handy for a cardmaker. Also, you can make envelopes as small as 2.5″ x 3.” This easy-to-use envelope punch works great for creating your own gift card envelopes, envelopes within envelopes and other projects. It includes a rounded corner punch.

9. Coloring in stamped images
Coloring in stamps is one of the elements of cardmaking that can intimidate people at first. it takes some time and practice to get the results you want, but it’s easier and more intuitive than you might imagine. Start with watercolor pencils or colored pencils. You’ve probably used these before, and they give you lots of control.
When you’re ready to move on to markers , there are the Tombow Dual Brush Markers. Ten-piece sets are a great way to get started, as the colors inside have been professionally paired together to create a pleasing color pallet. Each set comes with one clear blending pen; use this to aid in blending colors together. These dual brush pens are double ended — a bullet tip on one end great for drawing or smaller details and a brush tip on the other end great for coloring, brush lettering and more. To get watercolor-like results from these pens, first color with the brush end onto a plastic pallet or glass surface to create a color pallet, then dip a slightly wet paint brush into the color and then paint.
10. Invest in some specialty items
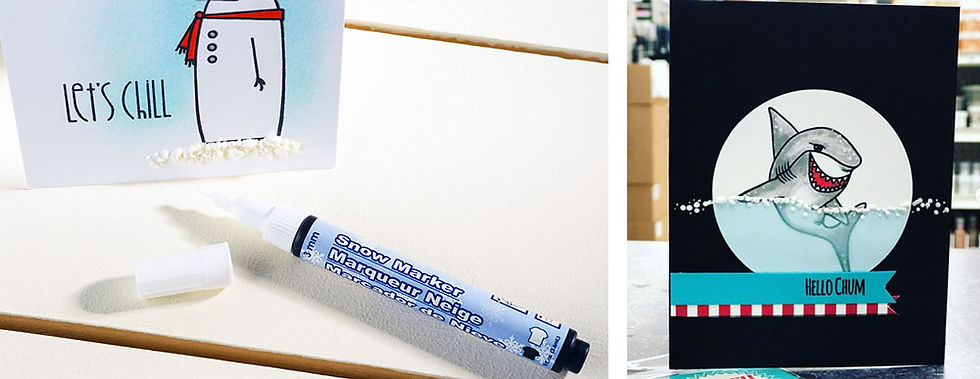
Every card needs some extra oomph to get to that completed look you’re striving for. Sometimes it’s twine, sequins, Nuvo drops, ribbon, etc. Add some shimmery glisten or a surprise element to a card by using the snow marker to take your card up a level.
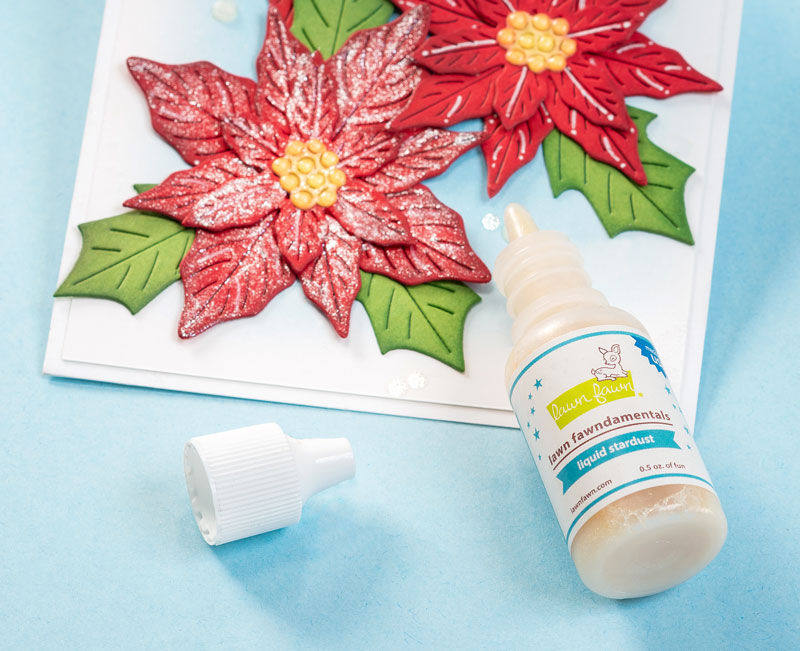
A newer item is Liquid Stardust by Lawn Fawn. Add this sparkle to your watercolors, ink palette or alcohol inks, and you’ll get sparkly colors. Or just apply straight from the bottle to add some glisten to any project.
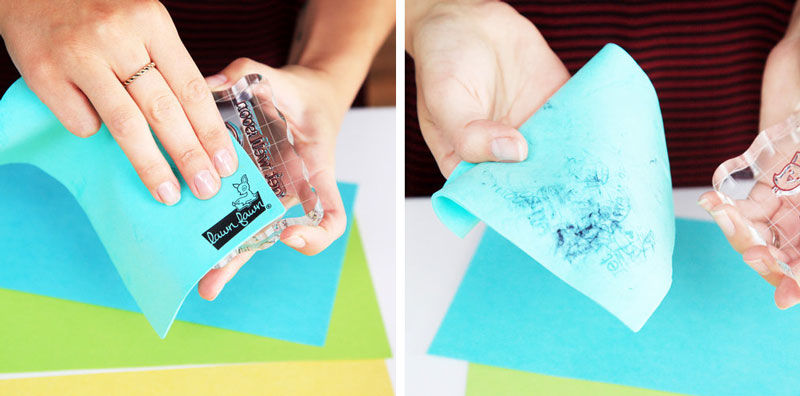
11. Cleaning stamps
Many people will tell you they use baby wipes to clean their stamps, and so long as they are alcohol free that is fine. But an even better choice is the Stamp Shammy by Lawn Fawn. All you need is a little water to moisten the shammy and then clean your stamps. It’s safe for your stamps; there are no chemicals being used. As you use it over and over again, you have no waste. The shammy will become stained with the ink as it is cleaned from your stamps; a stained shammy is proof that your stamps are well cared for. When the shammy dries out, simply re-wet.
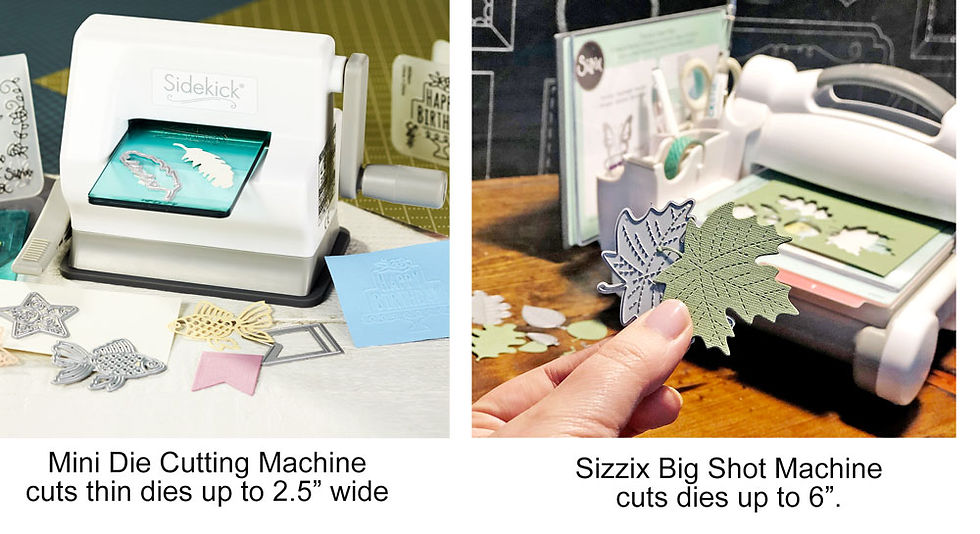
12. Die cutting machine
If you are in the market for something to up your cardmaking magic, the next must-have would be a die cutting machine. You have a lot of options here. You can make a smaller investment and get a smaller machine like the Sidekick, or you can get the larger die cutting machine like the Sizzix Big Shot.

According to Rita Shehan’s July 1, 2019 article “13 Card Making Tips and Tricks” at thesprucecrafts.com, taking the time to make a greeting card personally lets the receiver know just how special they are to you. The next card making tips and tricks will help you avoid many of the mistakes and problems beginning greeting card crafters face, helping kick up your card designs up a notch.
13. Determine card’s background color
Pick a color from the image you are using and make that your cardstock background color. Use one or two more colors from the picture to add similar colored embellishments and accents to your card.
14. Reuse leftover paper scraps
Beautiful papers are not cheap. Make sure to repurpose your saved paper scraps. You can always use your punches and die cut machine to cut simple shapes from the scrap paper. Use those paper shapes to embellish your cards. Who doesn't want to save money?
15. Look beyond normal sources for paper supplies
Did you ever go to the card section of the store and notice the beautiful gift bags and wrapping papers available for sale? Who says you can't use unconventional paper sources for cardmaking? Gift bags are often made from a heavier weight of paper that is just the right weight for cardmaking. All you have to do is unfold the bags and cut out the shapes you need, making sure to avoid the creased lines.
Wrapping paper is a bit thin, so you may have to reinforce it with some heavier paper as a backer. You may have to do a little more work with these papers, but they will be a beautiful addition to your card design. Just use spray adhesive to attach wrapping paper to cardstock. Make sure to lay the wrapping paper down carefully onto the sprayed cardstock, then flatten down with your finger or a bone folder, so that you do not get creases or air bubbles in the wrapping paper.

16. Use a white polymer eraser
When laying out cut paper shapes onto a card, people will often use a pencil to make light marks as a placement guide. After adhering your embellishments, the pencil marks need to be erased. Make sure only to use a white polymer eraser. Pink erasers and pencil erasers will leave dark spots and smudges on your card.
17. Round corners instead of square
Use some corner punches to give your card interest and a professional look. A simple 10mm corner punch will give you great results. You can also use the punch to give your photos and business cards an updated look.
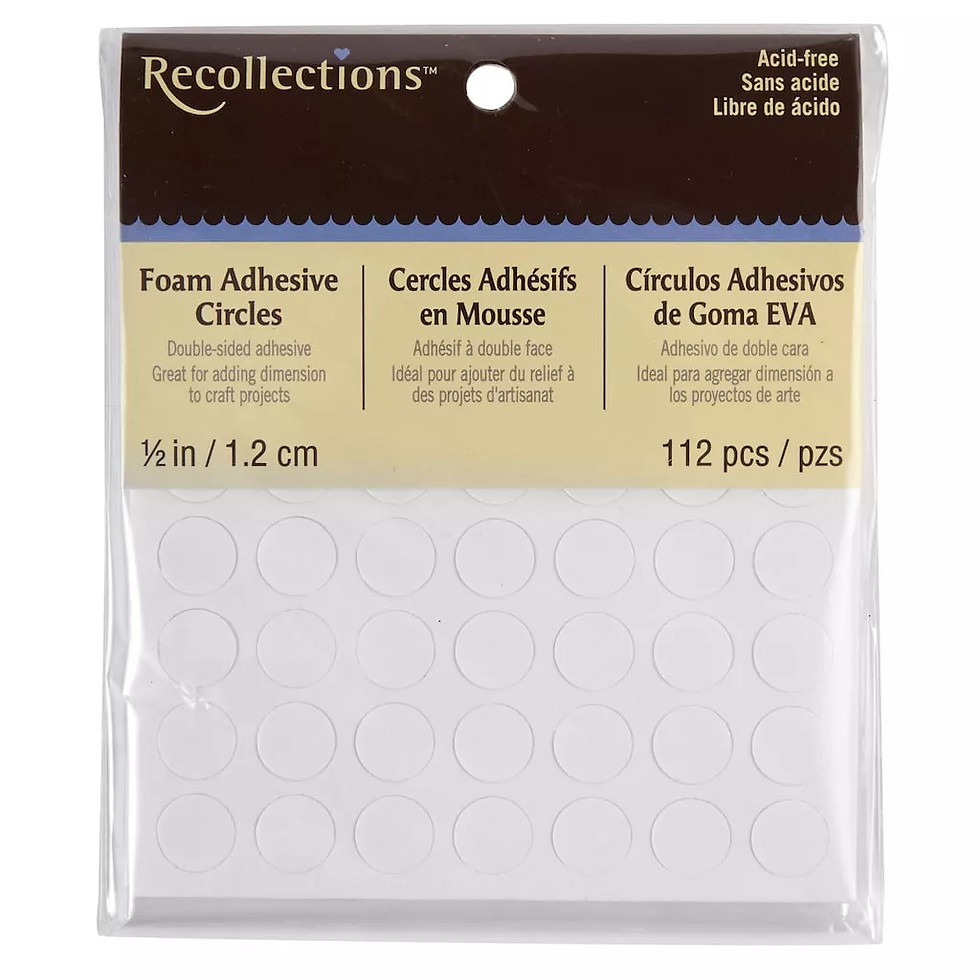
18. Use foam tape squares and dots to add dimensions to cards
Part of the fun of making cards is that you can quickly take them one step further from retail cards by adding elements with dimension. Foam tape and dots give just enough space between the items on the face of your card project to make them pop.
19. How to make permanent tape less permanent
Sometimes you want to attach elements to your cards to determine placement. You might wish to test various designs before choosing the final layout. Tape can be weakened by placing it on cloth and ripping it off several times. Your card background will not be damaged from the distressed tape.
20. Keep some generic cards on hand
Make some cards that are simple in design and use them for multiple occasions. When you are short on time and the need for a card arises, all you have to do is stamp the appropriate sentiment onto the card; you are finished. Easy peasy!
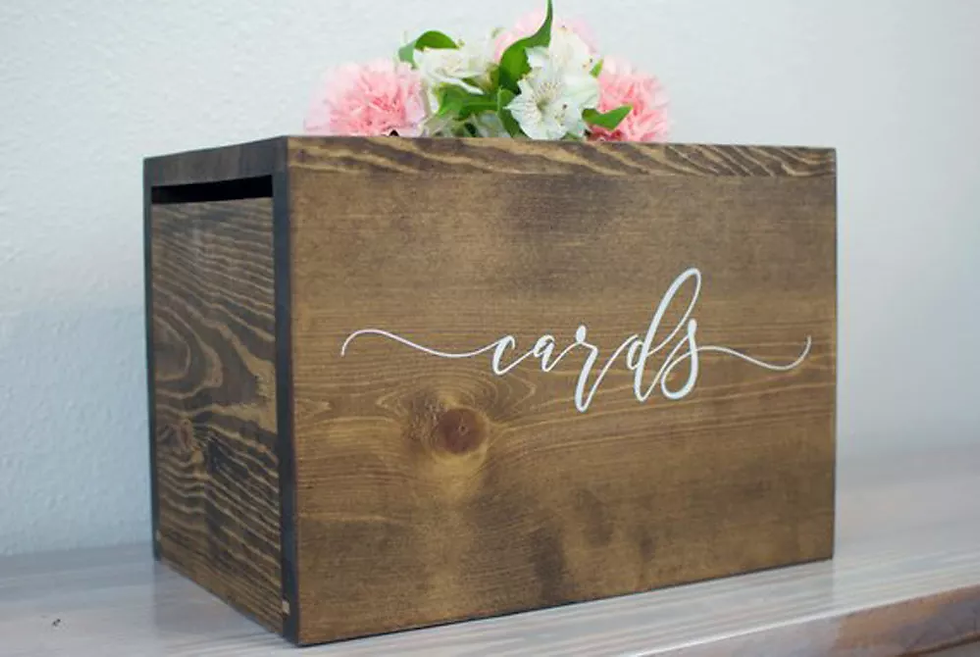
21. A card box can be useful
Have a storage box with file folders for each month of the year. Make your cards ahead of time and store them in the appropriate month's file folder. At the beginning of each month, pull out the cards and mail them. Never be rushed to make a card again!

22. A ribbon hack
Ribbons are a beautiful touch to card design, but sometimes you will find that the ends will fray. An easy fix to this problem is applying a bit of clear nail polish to the ends. No more fraying!
23. Card folding techniques
Learn how to make cards using different folding techniques. Your cards will be exciting and fun. Beccy Muir — a cardmaker from Australia — gives 129 examples and tutorials for card folding and design. What an inspiring source! Download her tutorials at https://momscraftclub.com/products/how-to-make-cards-by-beccy-muir-129-turtorials-easy-diy-cards.


Mình có lần lướt đọc mấy trao đổi trên mạng thì thấy nhắc tới bongdaso.org trong lúc mọi người đang bàn luận về kết quả các trận đấu, nên cũng mở ra xem thử cho biết. Mình không tìm hiểu sâu, chỉ xem qua trong thời gian ngắn để nhìn cách bố trí thông tin, tỷ số và các mục liên quan. Cảm giác là trình bày khá gọn, các phần rõ ràng nên đọc lướt cũng không bị rối, với mình như vậy là đủ để nắm thông tin cơ bản rồi trên bongdaso.org.